SEARCH
Enter keywords, product name, or question
1. Ensure safety first
- Disconnect the battery pack before inserting or removing any drill or driver bit.
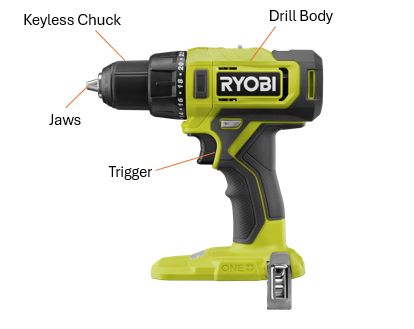
2. Identify the keyless chuck
- Ryobi 18V ONE+ drills feature a keyless chuck, which allows for quick and easy bit changes without tools.
3. Open the chuck
- Hold the drill body securely with one hand.
- With your other hand, rotate the keyless chuck anti-clockwise (to the left) to open the jaws wide enough to insert the bit.
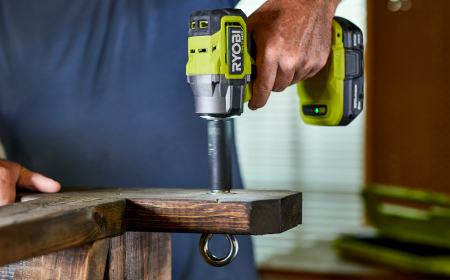
4. Insert the drill bit
- Insert the drill bit into the centre of the chuck, ensuring the cutting or driving end is pointing out of the drill.
- Ensure it is straight and centred, and at least 20mm into the chuck.
5. Tighten the chuck
- While still holding the drill body, rotate the chuck clockwise (to the right) to tighten the jaws around the bit.
- Make sure the bit is securely gripped and does not wobble.
- Do not over-tighten the chuck.
6. Test the bit
- Reconnect the battery pack.
- Grip the drill by the handle, ensuring your other hand is clear of the drill bit.
- Gently squeeze the trigger to ensure the bit spins correctly.
To remove
1. Ensure safety first
- Disconnect the battery pack before inserting or removing any drill or driver bit.
- If the drill bit was just used, it may be hot, so a cooling period may be required.
2. Identify the keyless chuck
- Ryobi 18V ONE+ drills feature a keyless chuck, which allows for quick and easy bit changes without tools.
3. Open the chuck
- Hold the drill body securely with one hand.
- With your other hand, rotate the keyless chuck anti-clockwise (to the left) to open the jaws wide enough to release the drill bit.
4. Remove the drill bit
- Drill bits may be sharp, so handle with care.
- While still holding the drill body, remove the drill bit from the chuck.
R18DD12, RDD18C, R18DD3-H25F, R18DD3-0, R18DDP2-H20G, R18DDBL-55S, R18PD2422B, R18CPD14, R18XPD142B, RPD18C, RPD18X, R18XPD14, R18PD3-H40G, R18PD3-H155S, R18PDBL-C55S, R18PD3-0, R18PD7-C15S, R18PD7-0, RDD18C1, RPD18C1