SEARCH
Enter keywords, product name, or question
Before You Begin
Important: Always remove the battery or disconnect from mains power before installing or removing the guard.
Preparation Steps
- Ensure the grinder is fitted with the main guard before use.
- Always disconnect the power (battery or corded) before installing or removing any guard.
Fitting the Guard
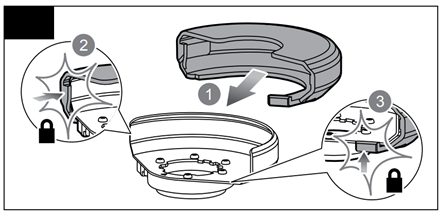
- Disconnect the grinder from power (remove battery or unplug).
- Align the grooves on the guard with those on the grinder housing (arrow indicators are provided on both the tool and the guard).
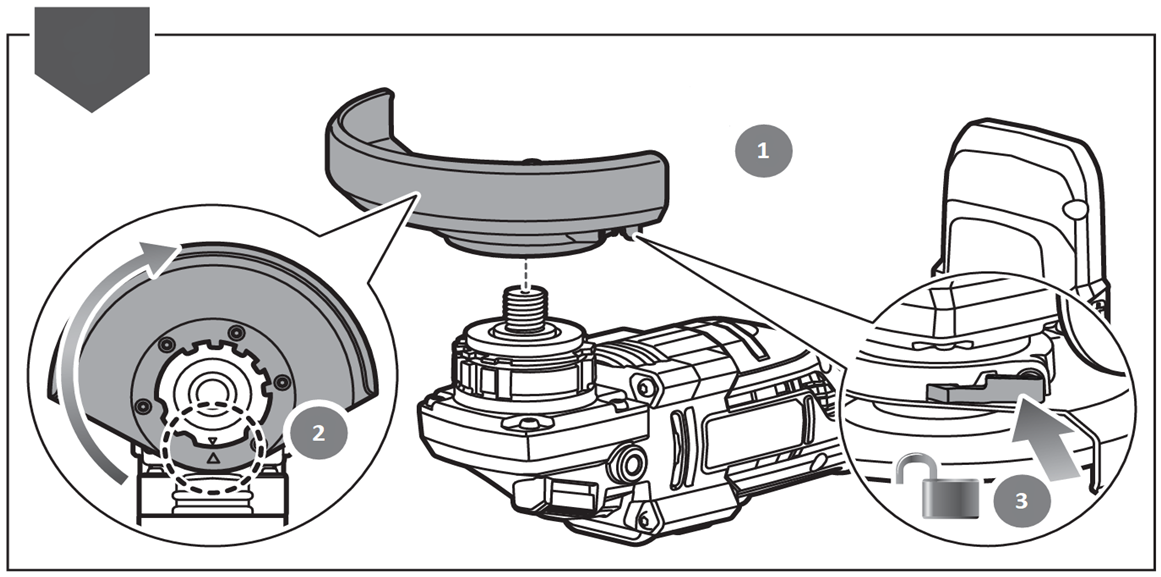
- Once locked in place, press the button on the guard to adjust it to the desired position.

- The guard must be positioned correctly to protect the operator’s hands — see examples in your user manual.
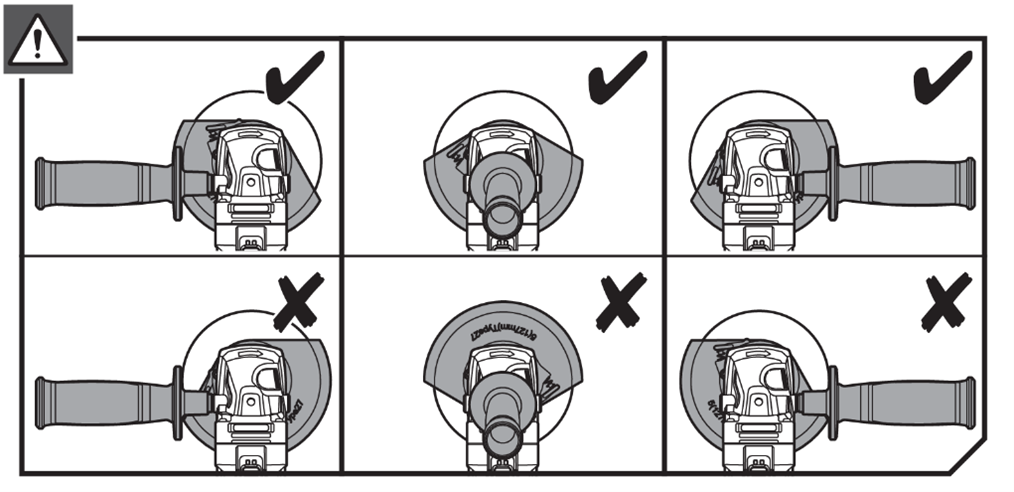
- Clip the cutting guard attachment over the main guard securely.
Note: If your angle grinder includes a clip-on cutting guard, fit it before cutting. This helps contain sparks and debris during operation.
R18AG7-0, RAG18X, R18AG1, R18AG15, RAG18X1