SEARCH
Enter keywords, product name, or question
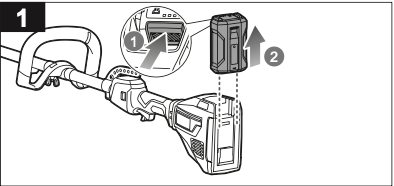
Safety First: Remove the battery.
Important: Always wear protective gloves before maintenance.
How to Replace the Trimmer Line on Your Ryobi Line Trimmer
- Remove the battery pack
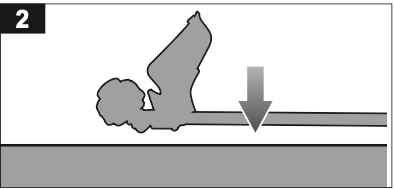
- Place the product on a level surface. Position the product with the motor side down and the blade guard side up.
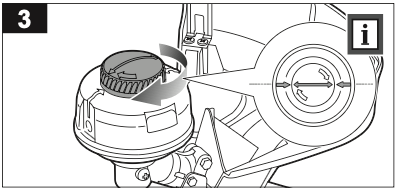
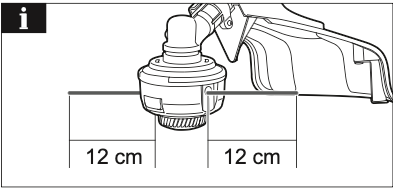
- Rotate the bump knob on the string head until the line on the center of the bump knob aligns with the arrows on the outer spool.
- Use a 2mm or 2.4mm diameter line depending on your model. Cut one piece of the line, approximately 3.0 m in length. Insert one end of the line through the eyelet on the side of the string head and push the line until it comes out through the eyelet on the other side. Continue to push the line through the string head until the line is even in length on both sides.
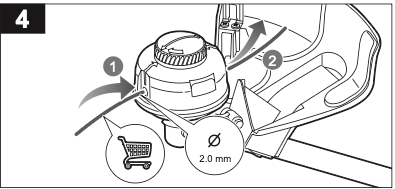
- Ensure that there are equal lengths of line on either side of the string head (max. 2.7m per side). Rotate the bump knob with the speed winder to wind the line.
NOTE: The bump knob can also be rotated by hand.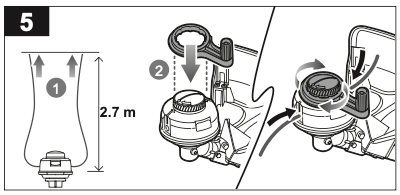
R18HLTR14, R18HLTR38, R18XLTR30, RLT36X20, RLT36BS, RLT36X4BL, RLT36BL, R36XLTR26, R36XLTR34, R36LTR20, R36LTR24, R36LTR12, R18XLTR35