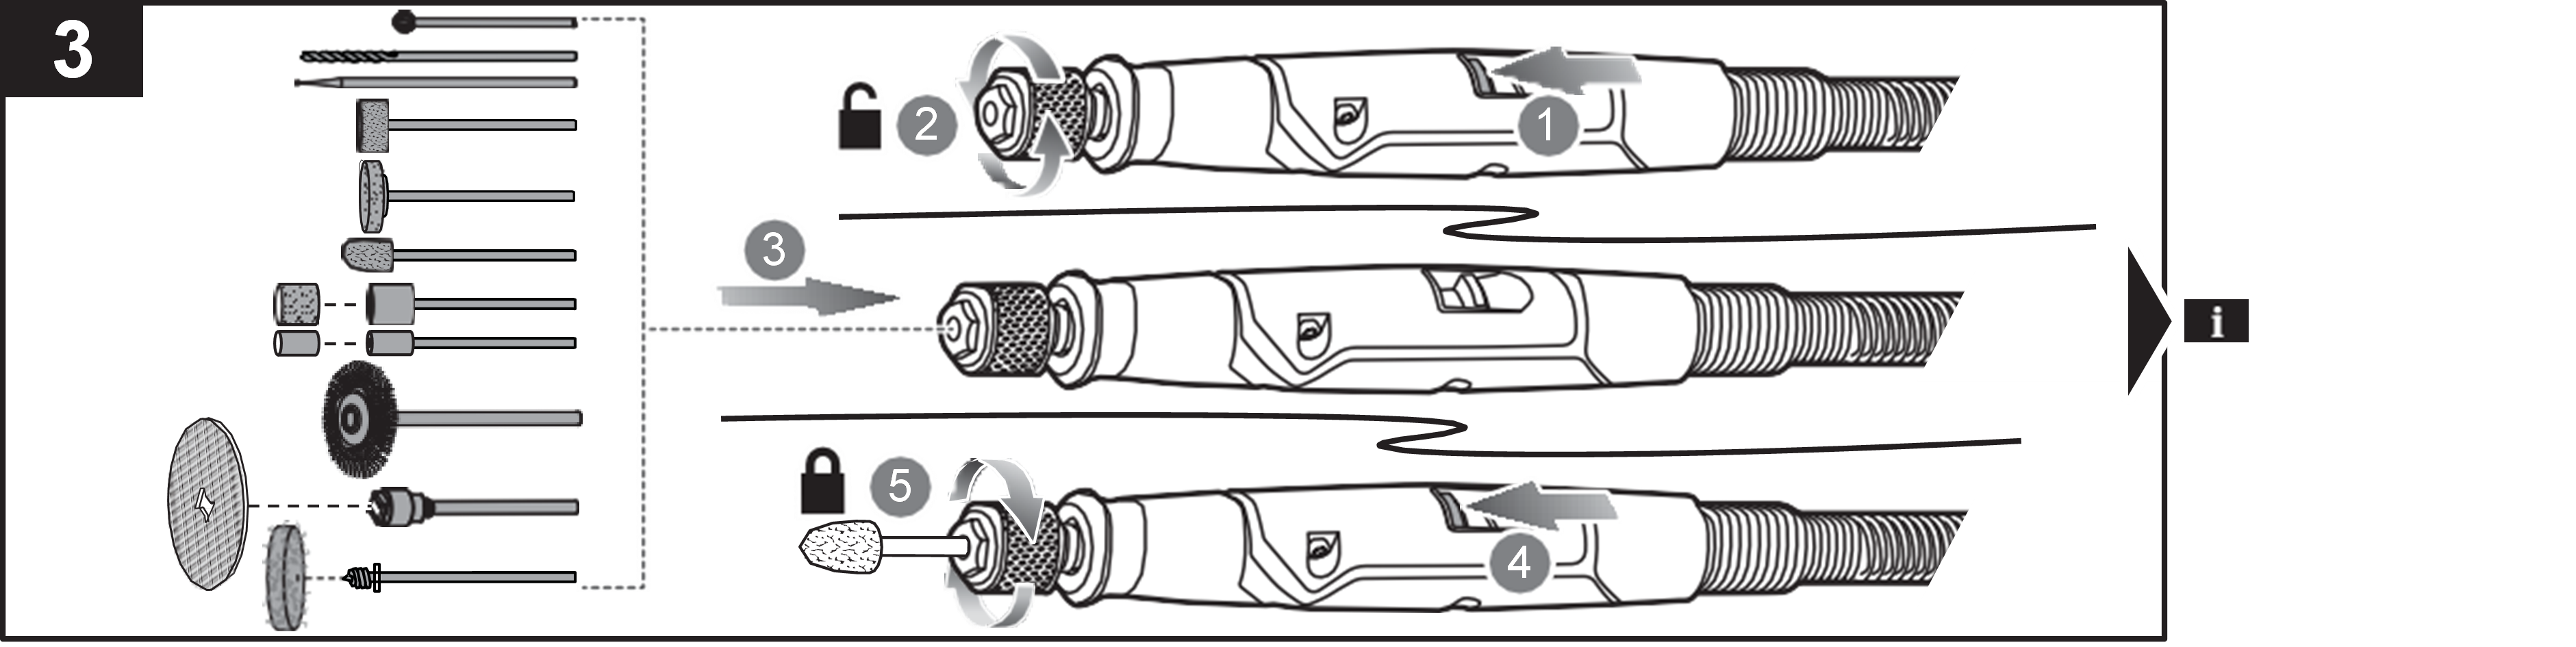
To install your accessory.
Ensure the Rotary tool is off & disconnected from Power / remove Battery.
1. Press and hold the spindle lock button and turn the shaft by hand until the spindle lock engages.
2. With the spindle lock engaged, place the included wrench on the bottom threaded end of the quick-change collet. Turn the quick-change collet counterclockwise to unlock.
3. Select an accessory that fits the collet and that is suitable for the intended application. Fully insert the accessory into the collet. Pull out the accessory off about 1/16 in. to allow for expansion when the accessory gets hot.
4. Press and hold the spindle lock button.
5. Turn the collet sleeve clockwise until the clicking sound stops and the collet secures the accessory.
Remember, do not tighten or loosen the quick-change collet without an accessory installed.
RRT130, RRT12, RRT18X, RRTS18, RRT4K, RRTCE16S4K